Woke up this morning, grabbed some coffee and started checking out the cab. It was pretty filthy. I cleaned out the surfaces beneath the passenger seat and rubber mat with a whisk broom. The seats have been recovered and made more padded, which is deteriorating into a red power. In areas that are sticky for some unknown reason the red dust mimics rust, but rubs off easily
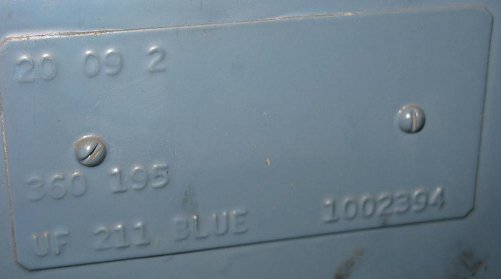
The door panels are old and worn out. It would be nice to replace them with some new pocketed door panels. The package shelf had an old bandaid box, a guide to rebuilding a carborator, the spare key (not from a VW blank), and a lot of the original door panel screws. All found items I placed in an old coffee can kept in my bus parts area. I pulled a lot of old dirt from the cab. The dash color is solid blue and the paint seems really original.
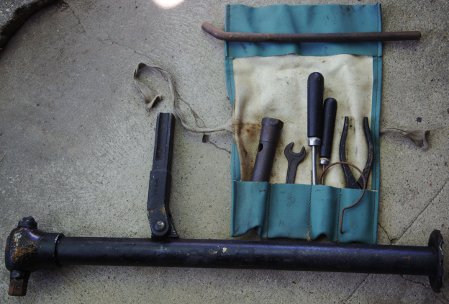
Pulled back the driver side seat and found some old oil change records from a service station in Sunnyvale (South Bay near Mountain View) on the bulkhead. It’s a bay area bus! With both seats pulled out of the way, looking in the toolbox area I found the original jack and the original toolkit, which was an awesome find. Had some breakfast and my mom borrowed my great aunts’ wet/dry shop vac for the day, so I could do some cleaning.
The original toolkit has the following:
- jack / lug socket with multi-purpose bar / pry bar.
- pliers / wire-cutter
- two wooden handled flat head screwdrivers, one with a very wide blade possibly used for changing the fan belt.
- wire hubcap puller
- wrench with 8mm and 13mm sizes

The original toolkit.
Also on the driver side was a church key attached just inside the drivers door at knee height. The rear engine latch and the engine fuel door use the church key and they’ve both been removed. So I’m guessing they broke or were removed by someone who didn’t know the church key’s location. I’ve ordered replacements and plan on installing them the next time I’m in Fresno.
The floor of the cab looked really good. There was a spot on the passenger side that had a rust bubble bigger than a quarter, but smaller than a half dollar. I flaked it up to check the strength of the area and it looks good, just needs some blasting and protection. I used the vac to get the inside free of loose dirt, but it still needs to be wet cleaned, which will come after the blasting. I’ve ordered a speed blaster since I’ll mainly be doing spot work (even if some of the spots are rather large in the cargo area).
My Dad came out and he helped me clean out the cargo section, which had a wooden workspace setup inside. Two metal u-shaped pices of metal clipped in to the lip around the roof and could be perfect to hold something surfboard shaped. A foot and a half high piece of plywood ran the length of the cargo area and was held on the cab end by two screws through the center of the bulkhead The back end of the plywood was held by a 3″ high piece that fits the width of the cargo area and boxes in an area over the engine compartment. Two other pieces were loose and one looked as if it was held by the u-shaped metal pieces because it was covered by hooks. The other wood piece could have formed a table or also hung from the metal pieces.
Once the cargo area had been cleared we looked at some rust. My Dad pulled out paint scrapers and we went at loosening the scaled rust over the engine compartment. That area has been bent down from overloading it with weight and the indented area has surface rust, but seems structurally sound. A lot of the original grey paint is still there, but the owner sprayed a fake granite paint in the inside that I’d like to strip off. In a few weeks I’ll see what some media blasting says about the condition of the metal below. After the cargo area was clean we pushed the bus out side the garage to inspect the front end.
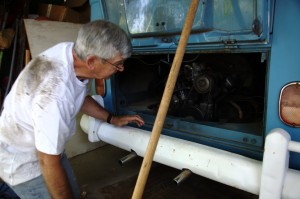
Last week on the 7th my Dad took the bus over to Siegfried’s in Fresno, who did an inspection and they pointed out what Reid and my Dad said about the front end. There is some sporadic looseness in the front end that requires over compensation with the wheel. I’ve not driven it, so I’ve not experienced it first hand, but it sounds like it could be bad. I’d found a good description of the process of inspecting the front end on thesamba (I’ll update with the link). And between the Muir book, Bently Manual, and the online info we tested the wheel bearings, tie rods, the stearing dampner, and stearing box. All seemed good except for a minor amount of play in the steering box, but nothing that I could see that would explain the wobbling described. This process involved removing the splash pan underneath the bus and also allowed us to get a view of how the emergency brake, shifter, and peddles are linked to the backend of the bus.
After the cargo area I turned my attention to a grey milk crate that the previous owner stored a bunch of junk in. It had the following:
- old tools (sears and roebuck ratchets with a flip flop mechanism)
- the old generator from the bus (need to look if it’s 6v)
- jumper cables
- A extendible grabber (think arcade claw game).
- 4 quarts of oil (not the weight that Glenn recommended the day before)
- rubber stripping for lining the rear cargo door
- The rear cargo door mechanism (just ordered one of these unfortunately)
- A plastic jar of really rusty pieces of metal.
- A T shaped rear catch handle that didn’t match the key
- Another VW latch for the engine compartment labeled BOMORO
- a cracked old generator belt
- some more stuff like crescent wrenches and odds and ends.
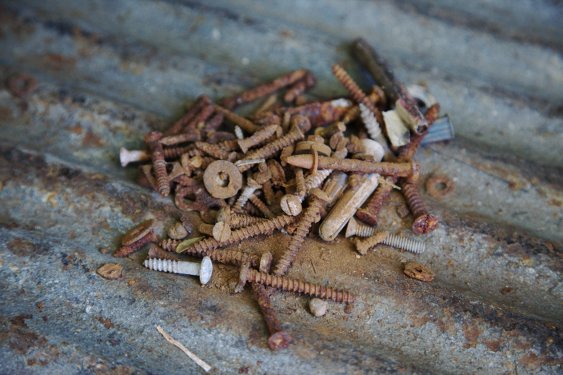
In that crate was the rear cargo door mechanism that we tried pairing with the door and in doing so heard some rattling from the rear cargo door. With a finger I could feel something inside, so I used the grabber to reach in and pull it out. Near where the rear cargo door has a slot for a rod was wedged a group of rusted screws and the sound of quite a few more came from inside the door. In the end I pulled a pile of screwes, bolts, spacers, and even a wood colored crayon for woodwork. The other door contained a home made paint scraper, so my Dad and I reasoned that the previous owner did a lot of paint work.

The cause of a rattling in the rear cargo door.
We paused for some lemonade and I checked out the cargo area dome light, which had been totally crushed and will need to be replaced. I pulled it and taped up the wire to keep it from working it’s way out of the frame. The interior light in the cab looks good, but needs a bulb and lens replacement. I’m also missing the switch in the cab to control the lights, which I found is rather expensive online. I’ll shop around a bit.
At this time it was getting late and my train back to Oakland was an hour and a half away. My brother Will showed up and we talked for a bit before pushing the bus back in the garage and cleaned up. A quick shower, dinner with the family, and a the train ride finished up the night. I had a great time getting things started and visiting with family and look forward to the next visit.
References:


